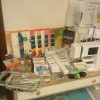
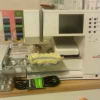
I am selling a Bernina Artista 180.
It comes with lots of accessories, lots of different press foots, books, software, hoops.....and includes a sewing machine table.
Click this link for detailed pictures of this machine and accessories I am selling.
http://stageeye.com/ebay/bernina/phpslideshow.php
Below I include a review I found about this machine:
""If I could sum up my experience of working with the Bernina Artista 180 in just one word, it would be "WOW!" I was expecting precision and reliability in the Swiss-made Bernina, and I wasn't disappointed. But I was completely blown away by the advanced technology in this computerized sewing and embroidery machine.
Even though this model has over 200 stitches, I didn't get overwhelmed with buttons. I only had to deal with 14 buttons and two knobs. Everything else I controlled by a large, easy-to-read touch screen that displays a wealth of information.
I always knew exactly how I had set every stitch because the stitch, the length, the width, and the needle position appear on the touch screen along with the foot I should use to obtain best sewing results. I picked stitches I wanted to use by just touching the screen.
I found it easy to find all the features by using the buttons to select stitch categories like quilting, applique, and embroidery. Once I selected the category, the screen displayed all the possible stitches for that category. I touched the picture of the stitch I wanted and I was ready to sew.
When I wanted to change the stitch attributes, I just turned a knob until I reached the desired size. I liked the way the 180 remembered the changes I made to each stitch. I set the stitch size for the feather stitch, then changed stitches. When I returned to the feather stitch, I was able to start sewing with all the changes I'd made earlier still in place.
I appreciated not having to chase the large, stable foot pedal across the floor like most other machines I've used. I used a light touch sometimes and still felt as though I had power and control. And I quickly got used to using the back part of the foot pedal to raise and lower my needle.
The Quilting Features
To test the quilting features, I started with the straight stitch for piecing. I wanted to check the 1/4" foot for accuracy but that foot does not work with this model because the feed dogs are so wide. Instead, I used the all-purpose foot. I moved my needle position and aligned my fabric with the right side of the foot. I found that this worked well for me.
I used needle position #7 for a 1/4" seam and needle position #8 for a scant 1/4" seam. I thought I would not be as accurate without the guide on the side of the foot, but the Bernina feeds the fabric evenly without a problem.
I tried the zigzag stitch/satin stitch using a small stitch length and everything from a very small to a very large stitch width. I liked the quality of all widths equally. I always check this stitch using a fusible web applique, a real test of the satin stitch. I believe the zigzag at any width and length will look good if it passes this test.
I sewed using the blanket stitch and the feather stitch and anything else I thought I would use to applique a design. I tried different sizes of each stitch. Again, all stitches performed well.
A Hand-Quilted Look
I tried two other stitches that I enjoyed using. The first stitch created a hand-look quilting stitch using monofilament thread on the top and a 50-weight thread in the bobbin. This stitch pulled the bottom thread up to the top so I could see the thread. The monofilament is almost invisible between the bobbin stitches. I really liked this feature.
The second stitch was an automatic stipple stitch. I fed the fabric under the needle just as though I was doing straight stitching. The machine used the built-in stipple pattern and quilted my piece. Pretty impressive!
I tried the Bernina's knee lift (which they call the Free Hand System). By pressing the side of my right leg against the lever that protrudes from the front of the machine, I lifted the presser foot and dropped the feed dogs, enabling me to move my quilting around without have to let go of my work.
I tried stippling using the standard darning foot and the extension sewing table. The table gave me a large surface on which I moved my work. The automatic tension made the stipple quilting as easy as straight stitch sewing.
A Few Drawbacks
As impressed as I was with the Bernina 180 as a whole, it's not without its drawbacks. My biggest complaint: I didn't like fooling around with its removable bobbin case.
Inserting the bobbin seemed awkward and I couldn't find a good way to hold it and get my hand into the compartment to insert the bobbin. And I had even more trouble inserting the bobbin with the extension table in place.
However, Bernina made two nice features to try make the bobbin handling better. First, a plastic window in the extension table allows a view of the bobbin compartment so I could see what I was doing.
And second, once I got the bobbin in place I just draped the bobbin thread over a hook on the side of the bobbin compartment and began sewing. The 180 automatically brought the bobbin thread up through the needle plate.
Another problem with the bobbin is that the Artista 180 uses metal bobbins unique to this machine. If I wanted to upgrade from another machine or even another model of Bernina, I'd have to get all new bobbins.
Finally, I had a small problem with the automatic tension. It did a good job for almost everything I tried, but then I wanted to change it for the metallic thread I was using.
When I tried to use the tension adjustments on the screen, it gave me every possible type of fabric from which to choose, but no thread choices. Quilters change tension because of thread types rather than because of changes in fabric, since most of the sewing is on 100% cotton.
The Bernina Web Site
If you're interested in Bernina machines, be sure to check out their Web site. I enjoyed looking at the pictures and feature lists of the Artista 180. Bernina drew a feature summary chart to compare several of their models. I also found a dealer list by state and artist profiles about John Flynn and Libby Lehman.
During the interactive tour of the Artista, Bernina offers videos that explain some of the features. These videos are from one to four million characters each and take a few minutes to download. They are short to view and have very little information. Unless you are really interested in a feature, you may want to skip this part of the tour.
Bernina Artista 180
by Bernina Sewing Machine""


There is 1 Comment
Re: Bernina Artista 180 FOR SALE
Hello,
Is the item still available? If so, how much are you asking? Thanks.
Myrna