By tydonk on
Nov 07, 2013
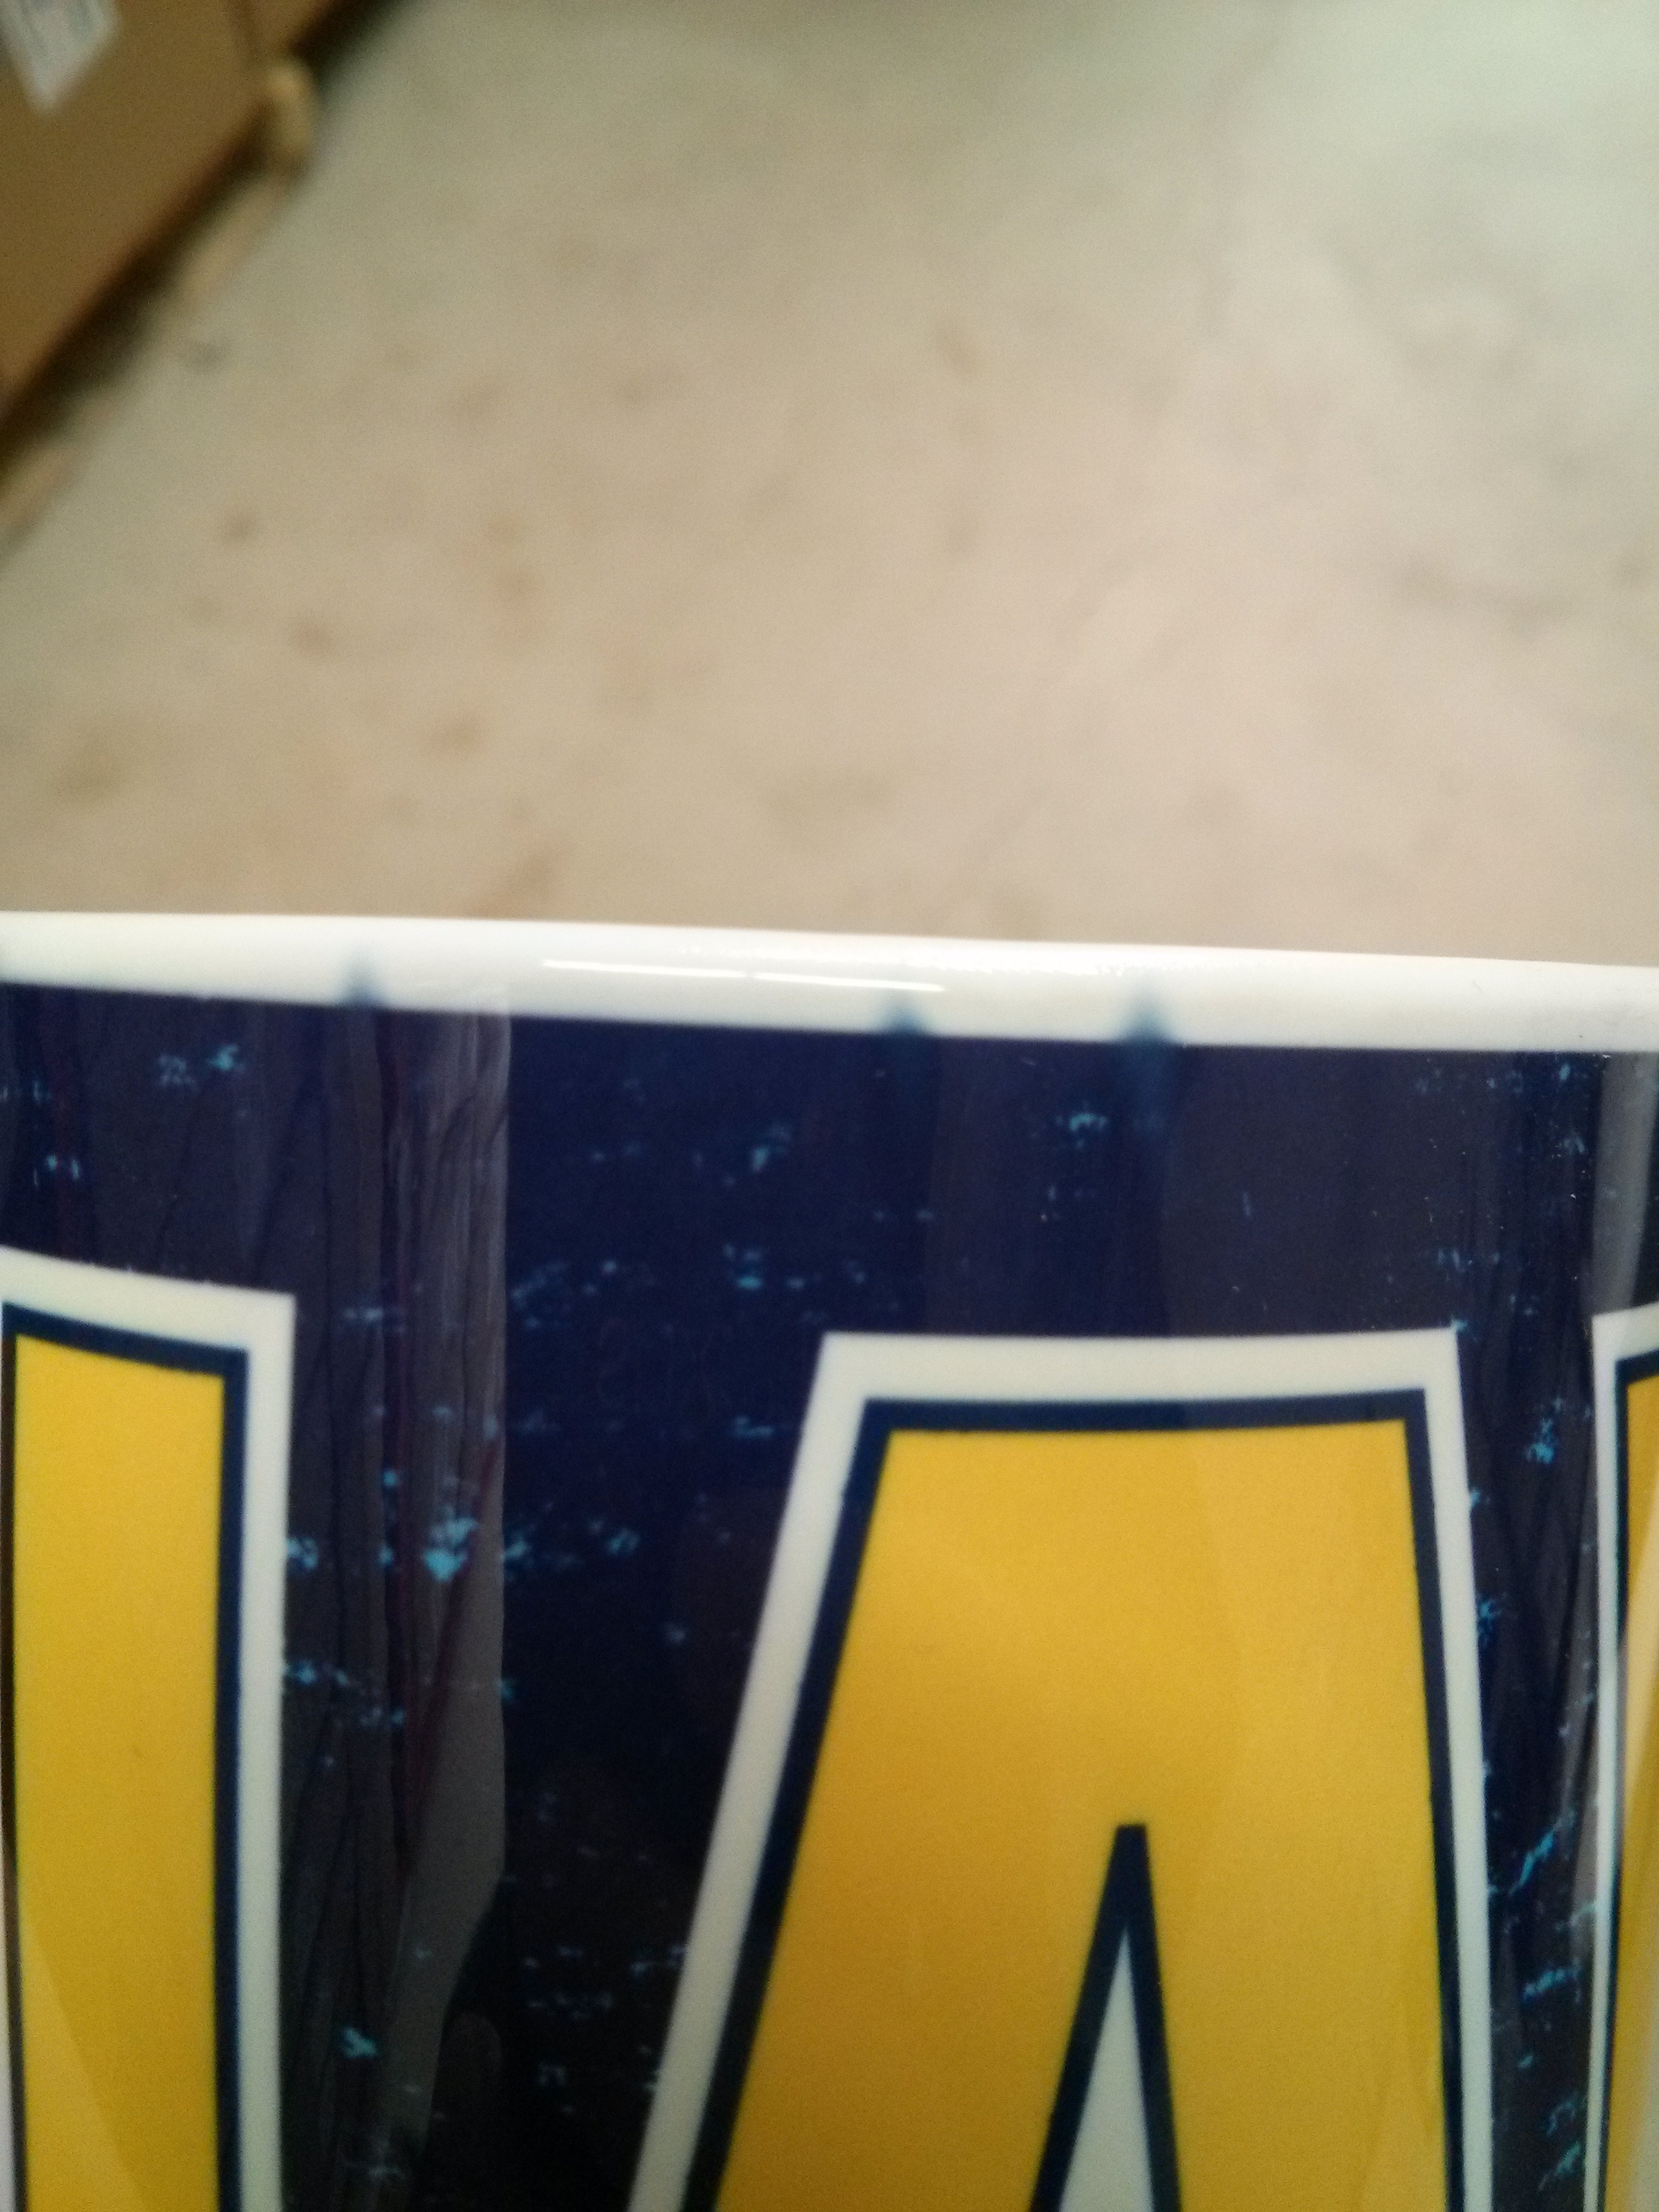
I'm using a GeoKnight DC16 press with the DC-MUG full wrap attachment. The ink appears to be "shooting" up from the paper, past the edge of the printed design. I have attached a photo, could someone please tell me what they think is causing this? We are pressing the mugs at 450F for 3:30, 4:00 if the print is a full bleed since we use a cover sheet. Additionally, we've found that without a cover sheet the ink goes through the back of the transfer paper and onto the transfer press pad which means it ends up on the next mug. Anyone else experience this? Thoughts? Ideas? Thanks in advance!
Attachment:
Re: Mug press bleed issues
I hope you've solved your problem by now, but this may help others that may have this issue.
It's probably due to inconsistent pressure at the top of your press pad and wrinkling in your paper. The moisture created from the heating of the ink is escaping in those areas and migrating out, taking some ink with it. The transfer must be absolutely tight against the mug surface.
A few things you can try:
Make your image smaller so you have about 1/8" less than the size of the mug press pad at the top (and bottom, if the bottom is also an issue). Don't do a full bleed unless the mug is smaller than your press pad.
When you place the transfer on the mug, take a damp cloth and wipe the back of it around the mug to help smooth it to the mug surface, then tightly wrap your cover sheet and hold it tight until you get it clamped in the press. You can also use a special spray tack adhesive or transfer tape to hold it on (only use the tape on the white edges of the transfer where there is no print or you might get lines). Conde sells Dye-Trans Pro Spray that works well, but I've found the damp cloth to work better. Don't saturate the paper, but you want enough to get the paper to conform well.
Use a silicone pad wrapped around the mug outside of the transfer and cover sheet. When I do a mug that is slightly bigger than my press I'll do this or use an oven wrap and an oven. The silicone provides more consistent heating and pressure. You can get silicone baking sheets at Wal-Mart (not the coated paper type, the big sheet of rubber type), usually in a 2 or 3 pack of different sizes and cut them lengthwise to fit your press. I cut mine so they are 1/4" - 1/2" larger at the top and bottom of the press. You can use the silicone for things like ceramic ornaments as well, things that would break if you used too much pressure on your heat press.
Make sure your cover sheet and silicone pad are long enough to be able to grip them tight while holding the handle of the mug when you're putting it in the press. (I got a huge roll of uncoated 18" butcher paper at Sam's Club that I use for cover paper, it's cheap and I can cut it to whatever size I like. It's also thin enough to be able to work with but not tear.)
Immediately pull the transfer off and cool the mug in a room temperature water bath to stop further ink transfer. (Only for ceramic, don't do this with glass - it'll crack.)
If you want the entire height of the mug imaged, it either has to be smaller than your press pad or you'll have to use the oven wrap method. I've done some dog bowls and mugs that are all the way to the edge that way.
Go to Conde's website and watch their videos on mug pressing. I really don't like Conde that much, but they do have good videos that will show you what you need.